How to Add a Text Box in Google Sheets: A Guide
Basics
May 9, 2024
Google Sheets is a versatile tool used for a variety of data management tasks. One of the handy features in Google Sheets is the ability to add text boxes, which can be useful for making notes, adding explanations, or simply organizing information visually. This guide will walk you through the process of adding a text box in Google Sheets so that you have the best-working spreadsheet possible.
How do I Insert a Text Box in Google Sheets?
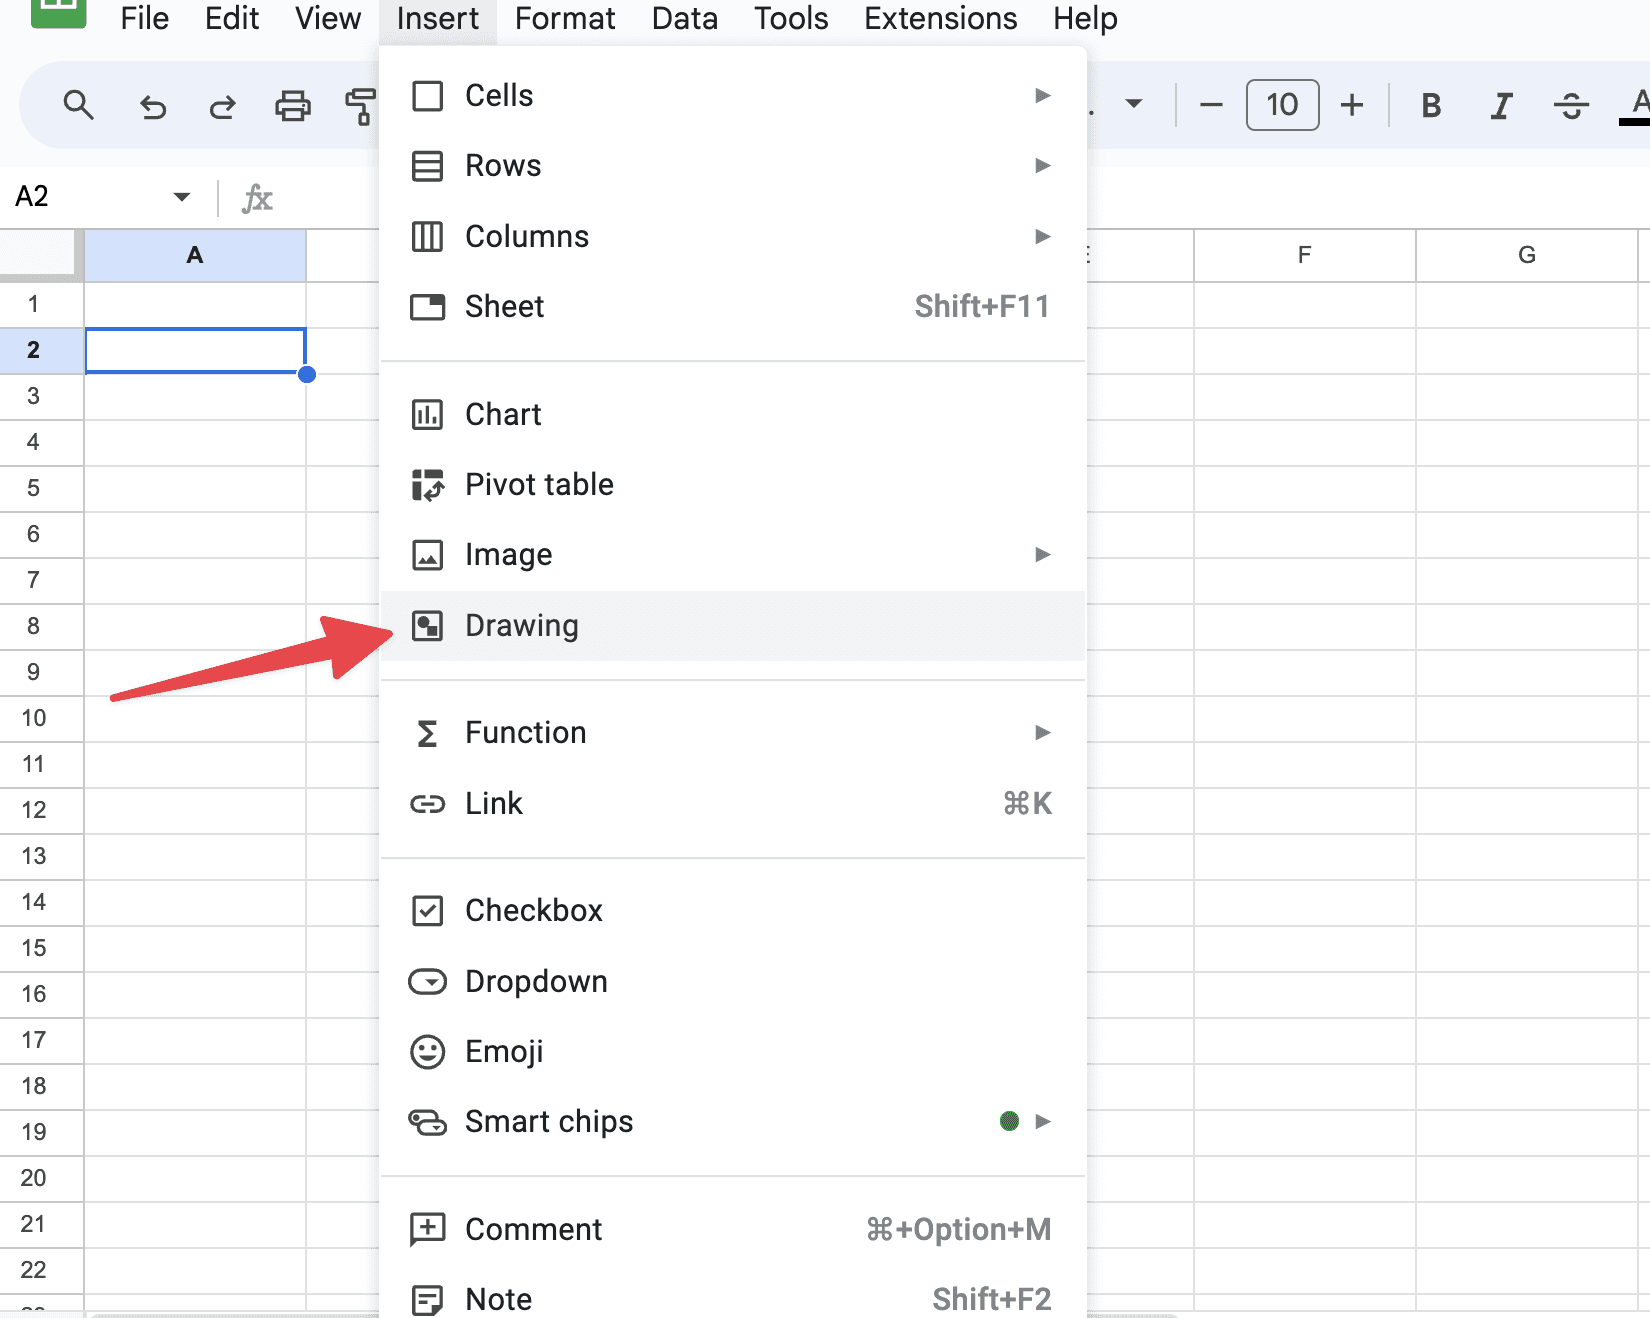
The first step in adding a text box in Google Sheets is to select the appropriate area where you want the text box to appear. Open your Google Sheets document and navigate to the worksheet where you want to add the text box. Once you’re ready to insert a text box, go to the menu bar at the top of the screen and click on “Insert.” In the drop-down menu, you will find the option “Drawing.” Click on it to open a new drawing interface:
In the drawing interface, you will see a bunch of tools for creating shapes, lines, and, importantly, text boxes. Click on the “Text box” icon, which typically looks like a “T” inside a box:
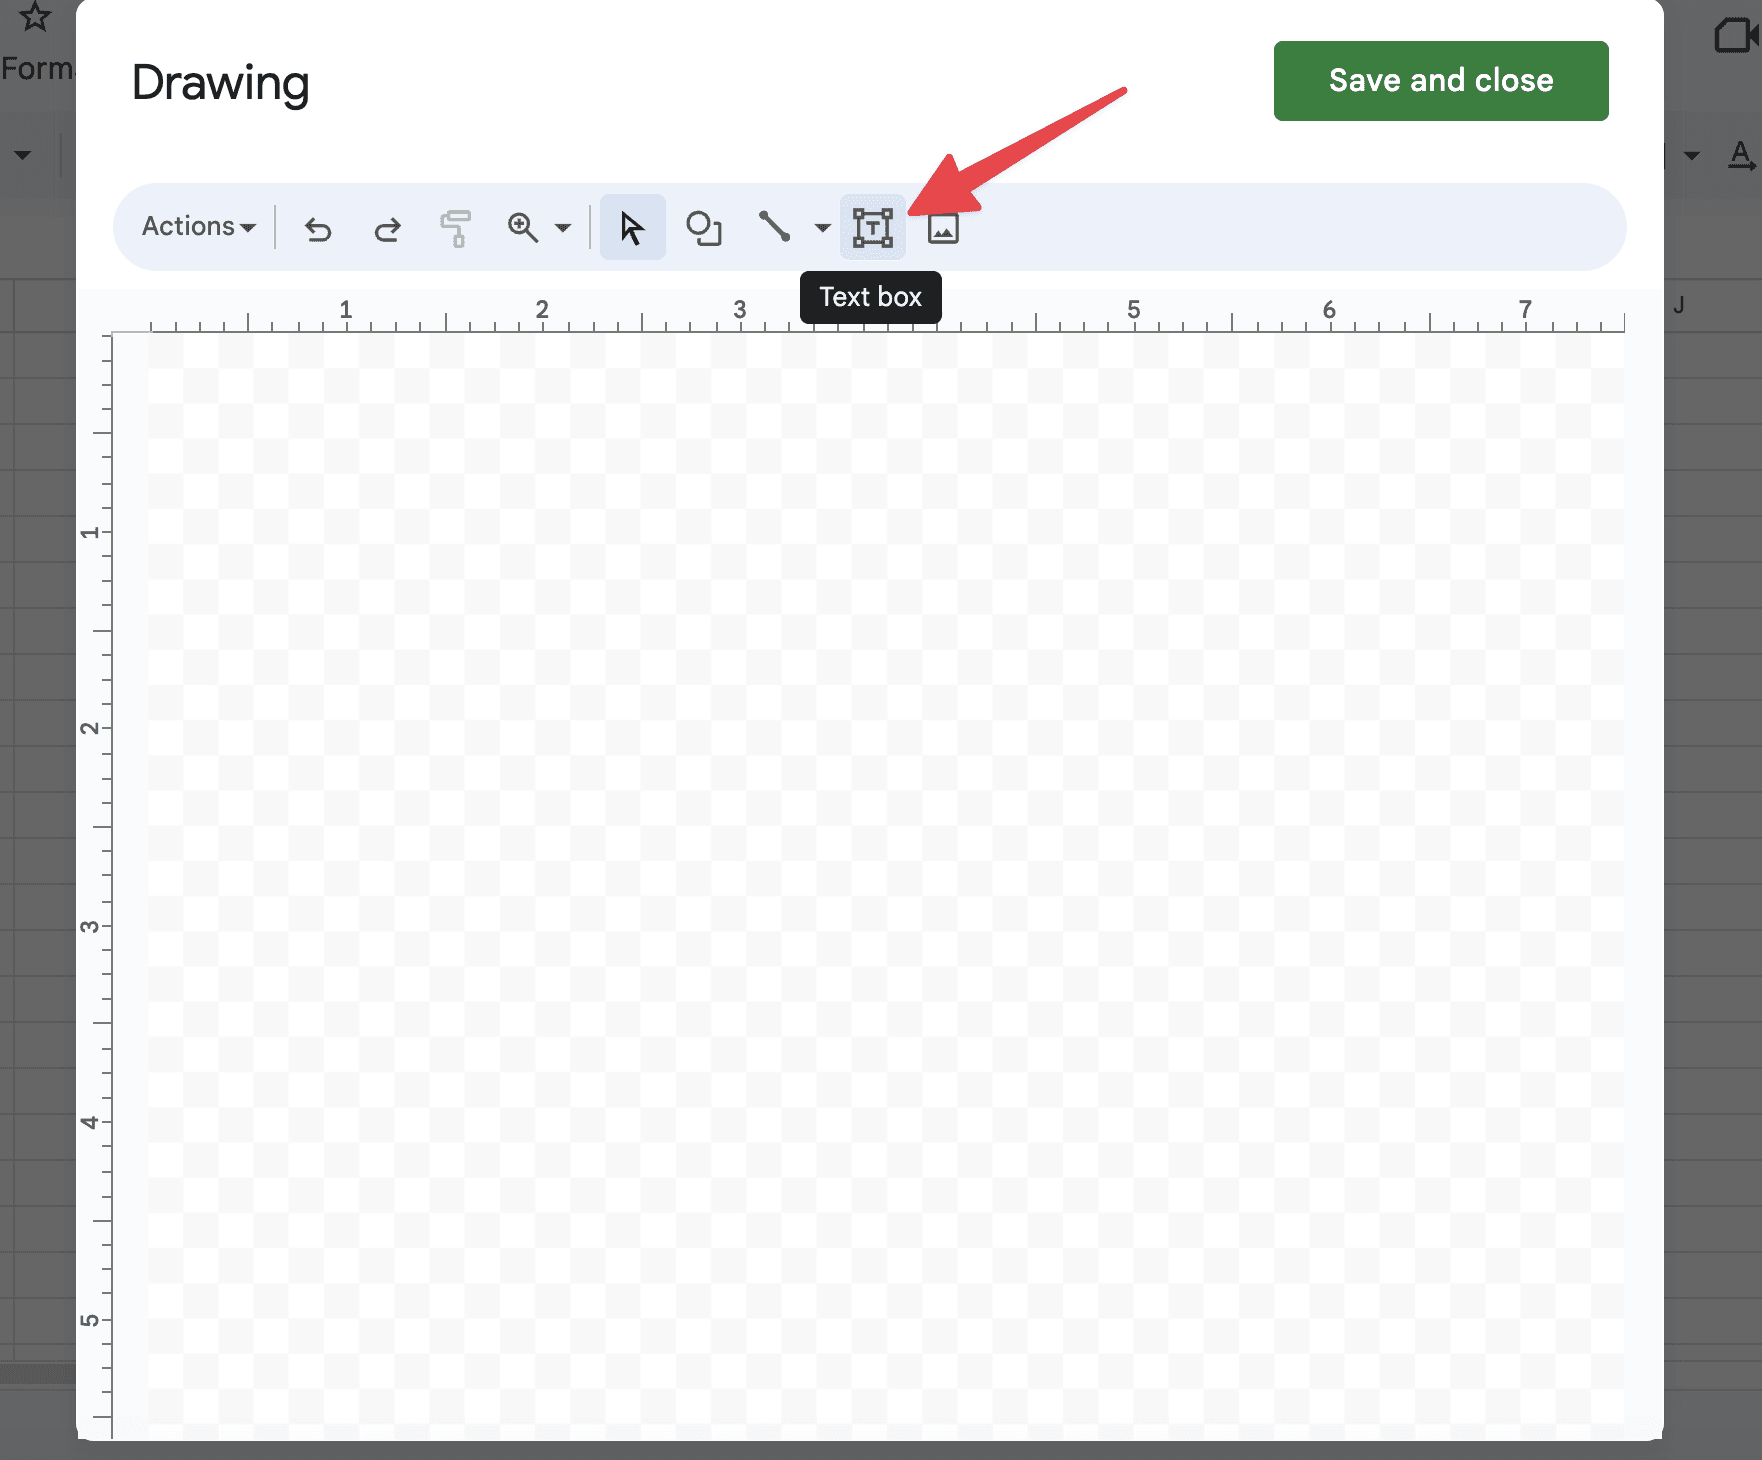
After clicking this icon, click and drag within the drawing area to create the text box. You can adjust the size of the text box by dragging the corners or edges to your desired dimensions.
Customizations
After placing the text box, you can type your text directly into it. The great thing about Google Sheets is that it allows you to format this text just as you would in a document editor. You can change the font type, size, color, and alignment using the options in the toolbar within the drawing editor. To make your text box stand out, you might also consider adding a border or changing the background color of the text box. These options are also available in the toolbar and can be adjusted with just a few clicks.
Once you are satisfied with the content and appearance of your text box, click the “Save and Close” button in the upper right corner of the drawing interface. This action will insert the text box into your spreadsheet. You can click and drag the text box to position it exactly where you need it on the sheet. Additionally, if you need to make further adjustments or edit the text, you can simply double-click on the text box to reopen the drawing interface.
Why Would You Do This?
There are a few reasons why you might want to add text boxes in Google Sheets:
Annotations and Comments: If you're collaborating on a spreadsheet or if the data within it is complex, text boxes can provide a way to make annotations directly next to relevant data. This can clarify what the data represents or how it should be interpreted, which is especially useful in shared environments.
Instructions and Guidelines: Text boxes can be used to add instructions or guidelines on how to use the spreadsheet, making it easier for new users to understand the workflow or data entry protocols.
Emphasizing Information: Sometimes, certain pieces of information need to stand out in a report or data set. A text box can highlight critical data points or conclusions drawn from the data, making them more noticeable and accessible at a glance.
Visual Appeal: Text boxes can help break up a sea of data, making a spreadsheet less daunting and more visually appealing. They can be used to create visually distinct sections in the data, aiding in both organization and presentation.
Managing Text Boxes for Better Workflows
Managing text boxes in Google Sheets is straightforward. If you decide later that you no longer need a text box, you can remove it by clicking on it to select it and then pressing the delete key on your keyboard. If your project requires multiple text boxes, you can duplicate existing ones by selecting them, right-clicking, and choosing "Copy" and then "Paste." This is particularly useful if you want to maintain a consistent look for annotations or notes across multiple parts of your spreadsheet.
Do People Use Them Often?
Yes, text boxes are quite commonly used in Google Sheets, although their usage can vary significantly depending on the user's specific needs and familiarity with the software. People often use text boxes for several reasons:
Clarification and Commentary: They are an excellent way to add non-data text that clarifies or comments on the data, especially in shared spreadsheets where such context helps collaborators understand the purpose and findings of the spreadsheet.
Reports and Dashboards: In reports or dashboard-style spreadsheets, text boxes are useful for titling sections, providing summaries, or explaining the methodologies behind data calculations.
Guidance for Users: In organizational or template spreadsheets, text boxes often provide instructions or guidelines for how to use the document, especially when the spreadsheet will be used by multiple people over time.
Project Management: In project management tools created with Google Sheets, text boxes can be used to highlight project statuses, key dates, and other critical text-based information that needs to stand out from raw data.
Despite their utility, some users might opt for other methods of adding text, like using merged cells or dedicated header rows/columns. The choice between these methods often depends on the user's specific needs and personal or organizational preferences in spreadsheet design.
The TLDR
Adding a text box in Google Sheets is a simple process that can greatly enhance the functionality and appearance of your spreadsheets. Whether you're looking to annotate data, add notes for collaborators, or simply organize information visually, text boxes are an excellent tool to achieve these goals. With the ability to customize the text and box itself, you have full control over how these elements integrate with the rest of your data. By following the steps outlined in this guide, you should feel confident in your ability to utilize text boxes effectively within your Google Sheets projects.
About the Author

Kris Lachance
Managing Editor
Kris is the Managing Editor of Spreadsheet Secrets. He is a finance professional, writer and entrepreneur based in Canada.
How to Add a Text Box in Google Sheets: A Guide
Basics
May 9, 2024
Google Sheets is a versatile tool used for a variety of data management tasks. One of the handy features in Google Sheets is the ability to add text boxes, which can be useful for making notes, adding explanations, or simply organizing information visually. This guide will walk you through the process of adding a text box in Google Sheets so that you have the best-working spreadsheet possible.
How do I Insert a Text Box in Google Sheets?
The first step in adding a text box in Google Sheets is to select the appropriate area where you want the text box to appear. Open your Google Sheets document and navigate to the worksheet where you want to add the text box. Once you’re ready to insert a text box, go to the menu bar at the top of the screen and click on “Insert.” In the drop-down menu, you will find the option “Drawing.” Click on it to open a new drawing interface:
In the drawing interface, you will see a bunch of tools for creating shapes, lines, and, importantly, text boxes. Click on the “Text box” icon, which typically looks like a “T” inside a box:
After clicking this icon, click and drag within the drawing area to create the text box. You can adjust the size of the text box by dragging the corners or edges to your desired dimensions.
Customizations
After placing the text box, you can type your text directly into it. The great thing about Google Sheets is that it allows you to format this text just as you would in a document editor. You can change the font type, size, color, and alignment using the options in the toolbar within the drawing editor. To make your text box stand out, you might also consider adding a border or changing the background color of the text box. These options are also available in the toolbar and can be adjusted with just a few clicks.
Once you are satisfied with the content and appearance of your text box, click the “Save and Close” button in the upper right corner of the drawing interface. This action will insert the text box into your spreadsheet. You can click and drag the text box to position it exactly where you need it on the sheet. Additionally, if you need to make further adjustments or edit the text, you can simply double-click on the text box to reopen the drawing interface.
Why Would You Do This?
There are a few reasons why you might want to add text boxes in Google Sheets:
Annotations and Comments: If you're collaborating on a spreadsheet or if the data within it is complex, text boxes can provide a way to make annotations directly next to relevant data. This can clarify what the data represents or how it should be interpreted, which is especially useful in shared environments.
Instructions and Guidelines: Text boxes can be used to add instructions or guidelines on how to use the spreadsheet, making it easier for new users to understand the workflow or data entry protocols.
Emphasizing Information: Sometimes, certain pieces of information need to stand out in a report or data set. A text box can highlight critical data points or conclusions drawn from the data, making them more noticeable and accessible at a glance.
Visual Appeal: Text boxes can help break up a sea of data, making a spreadsheet less daunting and more visually appealing. They can be used to create visually distinct sections in the data, aiding in both organization and presentation.
Managing Text Boxes for Better Workflows
Managing text boxes in Google Sheets is straightforward. If you decide later that you no longer need a text box, you can remove it by clicking on it to select it and then pressing the delete key on your keyboard. If your project requires multiple text boxes, you can duplicate existing ones by selecting them, right-clicking, and choosing "Copy" and then "Paste." This is particularly useful if you want to maintain a consistent look for annotations or notes across multiple parts of your spreadsheet.
Do People Use Them Often?
Yes, text boxes are quite commonly used in Google Sheets, although their usage can vary significantly depending on the user's specific needs and familiarity with the software. People often use text boxes for several reasons:
Clarification and Commentary: They are an excellent way to add non-data text that clarifies or comments on the data, especially in shared spreadsheets where such context helps collaborators understand the purpose and findings of the spreadsheet.
Reports and Dashboards: In reports or dashboard-style spreadsheets, text boxes are useful for titling sections, providing summaries, or explaining the methodologies behind data calculations.
Guidance for Users: In organizational or template spreadsheets, text boxes often provide instructions or guidelines for how to use the document, especially when the spreadsheet will be used by multiple people over time.
Project Management: In project management tools created with Google Sheets, text boxes can be used to highlight project statuses, key dates, and other critical text-based information that needs to stand out from raw data.
Despite their utility, some users might opt for other methods of adding text, like using merged cells or dedicated header rows/columns. The choice between these methods often depends on the user's specific needs and personal or organizational preferences in spreadsheet design.
The TLDR
Adding a text box in Google Sheets is a simple process that can greatly enhance the functionality and appearance of your spreadsheets. Whether you're looking to annotate data, add notes for collaborators, or simply organize information visually, text boxes are an excellent tool to achieve these goals. With the ability to customize the text and box itself, you have full control over how these elements integrate with the rest of your data. By following the steps outlined in this guide, you should feel confident in your ability to utilize text boxes effectively within your Google Sheets projects.
About the Author
Kris Lachance
Managing Editor
Kris is the Managing Editor of Spreadsheet Secrets. He is a finance professional, writer and entrepreneur based in Canada.

Spreadsheet Secrets
Helping you get better at all things spreadsheets. From learning functions to helpful tips and tricks. Microsoft Excel, Google Sheets, Apple Numbers, Office 365, whatever you use we can help you with.
Contact us here: ssheetsecrets@gmail.com
© 2024 Spreadsheet Secrets.
Spreadsheet Secrets
Helping you get better at all things spreadsheets. From learning functions to helpful tips and tricks. Microsoft Excel, Google Sheets, Apple Numbers, Office 365, whatever you use we can help you with.
Contact us here: ssheetsecrets@gmail.com
© 2024 Spreadsheet Secrets.
Spreadsheet Secrets
Helping you get better at all things spreadsheets. From learning functions to helpful tips and tricks. Microsoft Excel, Google Sheets, Apple Numbers, Office 365, whatever you use we can help you with.
Contact us here: ssheetsecrets@gmail.com
© 2024 Spreadsheet Secrets.