How to Wrap Text in Google Sheets
Formatting
May 12, 2024
Google Sheets is a versatile tool that many use for organizing, analyzing, and presenting data. One common task in Google Sheets is wrapping text within cells. Text wrapping is particularly useful when dealing with lengthy strings of text that surpass the default cell width, enabling the content to remain visible without manually adjusting the column size. This guide will walk you through the steps to effectively wrap text in Google Sheets, enhancing both the readability and aesthetic of your spreadsheets.
Understanding What It Is
Text wrapping in Google Sheets refers to the process of fitting text within the confines of a cell by expanding the cell vertically. This ensures all content is visible without altering the width of the cell, which can be crucial for maintaining the structure and layout of your spreadsheet. Wrapped text is automatically adjusted according to the cell's width; if you change the width, the text reflows to fit the new dimensions.
How Do You Wrap Text in Google Sheets?
To wrap text in Google Sheets, you need to follow a simple procedure. First, open your Google Sheets document and select the cells where you want the text to be wrapped. You can select a single cell, multiple cells, or an entire column or row depending on your needs.
Once the desired cells are selected, navigate to the toolbar located at the top of the page. Here, you will find the "Text wrapping" button characterized by an icon with lines of text and an arrow indicating wrapping:
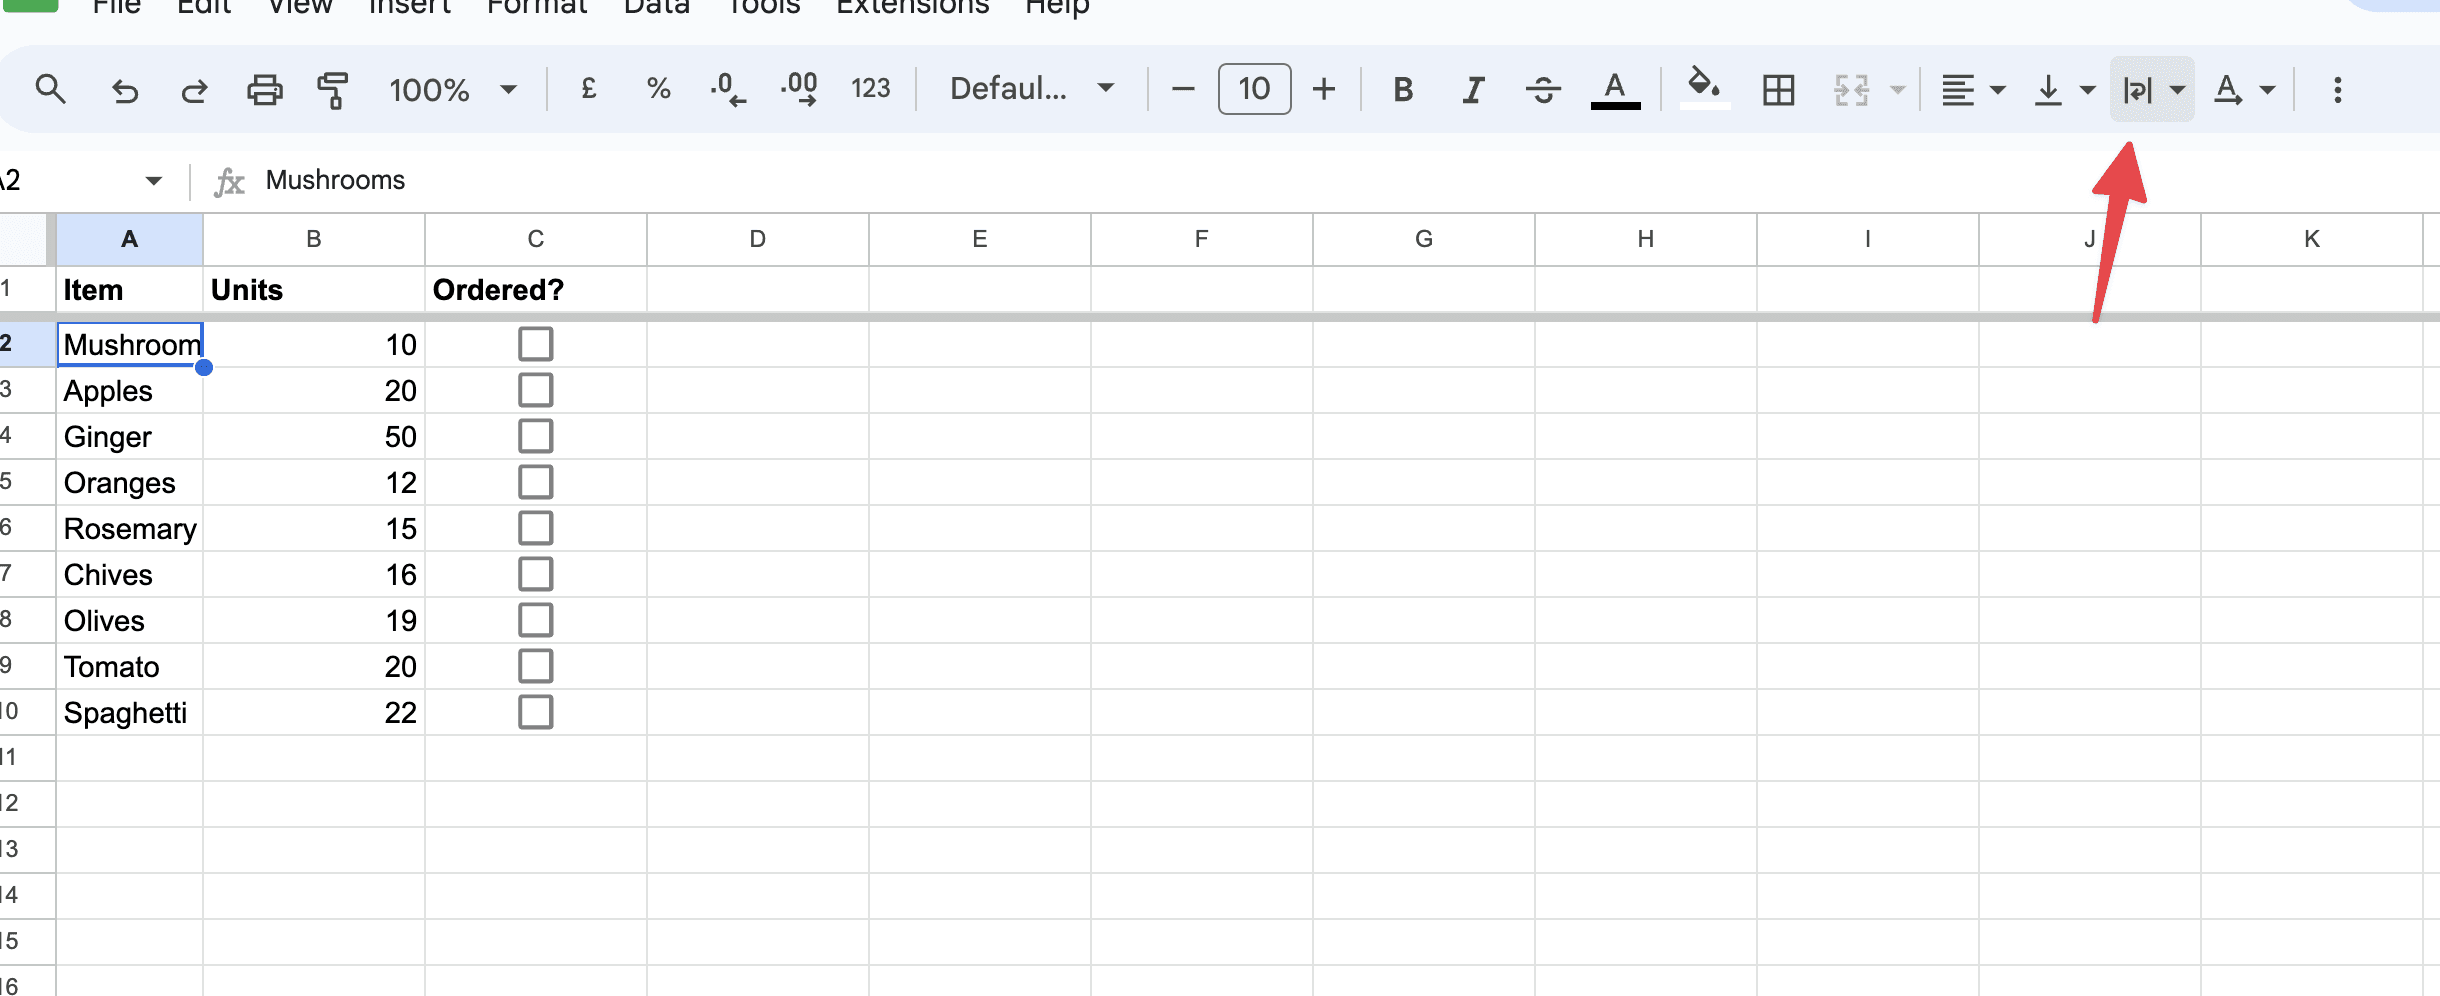
Click on this button, which will open a dropdown menu providing you with three options: "Overflow," "Wrap," and "Clip."
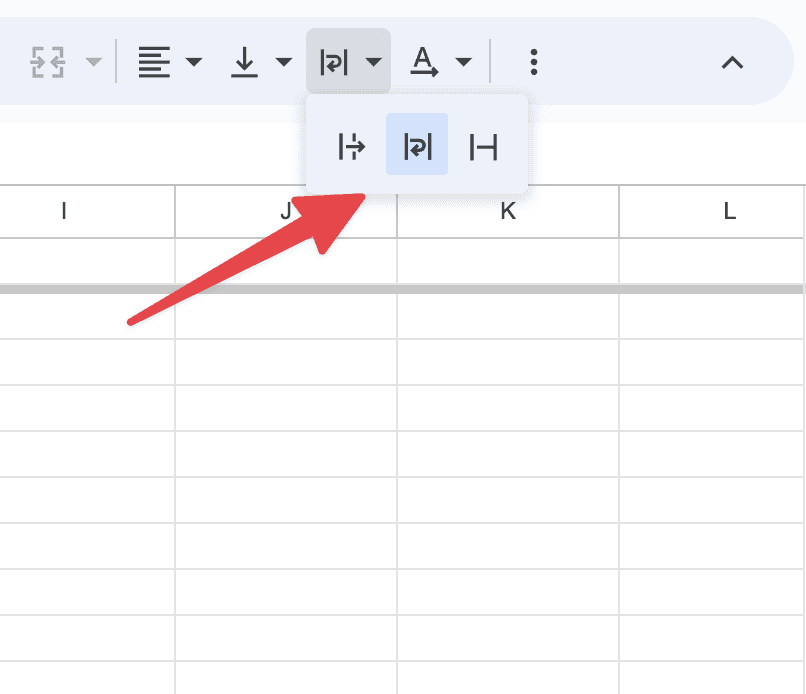
Overflow is the one on the left. It allows the text to spill over into adjacent cells if they are empty.
Wrap is the one in the center. It adjusts the height of the cell and wraps the text within its borders.
Clip is the one on the right. It cuts off the text that doesn't fit within the cell's width.
For text wrapping, select the "Wrap" option. The text within your selected cells will immediately be wrapped to fit the cell dimensions, expanding the cell vertically as needed to accommodate all text visibly.
How to Automatically Wrap Text in Google Sheets?
To automatically wrap text the default in Google Sheets for every cell you work with, you can set a default wrapping style for the entire sheet or specific ranges that you often use. This ensures that any text you input into these cells will automatically be wrapped without needing to adjust the settings manually each time. Here’s how you can do it:
Open Your Google Sheets Document: Start by opening your Google Sheets document where you want the text to be automatically wrapped.
Select the Range or Sheet: You can either select specific cells, entire rows, columns, or the whole sheet depending on your needs. To select the whole sheet, click on the square between the row numbers and column letters at the top left corner of the sheet.
Set the Wrapping Style:
Select wrap from the options, per the instructions above
Adjust Column Widths if Necessary: While the text will now automatically wrap according to the cell’s current size, you might still want to adjust the widths of your columns to accommodate the typical length of data you expect to input.
By setting the wrap text option as described, any data you input into the selected cells will automatically be wrapped, keeping your sheets neat and readable without additional adjustments each time you add new data. This is especially useful in sheets that are frequently updated or shared among multiple users.
Adjusting Cell Dimensions
While wrapping text automatically adjusts the cell's height, you may sometimes need to manually adjust the column width to achieve the desired formatting. This can be done by positioning your cursor on the line between two column headers until it turns into a double-sided arrow. Click and drag the boundary to increase or decrease the column width. As you adjust the column width, the wrapped text will reflow to fit the new width.
Is There a Shortcut?
Yes, there is a keyboard shortcut in Google Sheets to quickly apply text wrapping to selected cells, which can make the process faster and more efficient, especially if you frequently need to adjust text wrapping as you work.
Here’s how to use the keyboard shortcut:
Select the Cells: First, click on the cells or range of cells where you want to enable text wrapping.
Use the Shortcut:
For Windows and Linux users: Press
Alt+O, thenW, thenWagain. This sequence opens the Format menu, selects Text wrapping, and then chooses Wrap.For macOS users: Press
Option+O, thenW, thenWagain to achieve the same result.
This shortcut quickly toggles the wrap text setting for the selected cells without needing to use the mouse or touchpad to navigate through the menus. It's a convenient way to manage text wrapping as you work through your data in Google Sheets.
Tips & Tricks
Here are a few tips to enhance your experience with text wrapping in Google Sheets:
Uniformity: To maintain a neat and organized look, apply the same wrapping settings to entire rows or columns instead of individual cells.
Font size: Consider adjusting the font size if the text still appears congested after wrapping. Smaller font sizes can make the text fit better and look cleaner.
Cell padding: Adjust the cell padding to add some space around your text, making it easier to read. This can be done from the "Format" menu under "Cells" and then "Cell padding."
The Gist
Text wrapping in Google Sheets is a fundamental skill that enhances the presentation of your data by keeping it readable and well-organized. By following the steps outlined in this guide, you can efficiently manage lengthy pieces of text in your spreadsheets. Whether you are preparing a report, organizing data, or simply making your spreadsheet easier to read, understanding how to wrap text effectively is invaluable.
About the Author

Kris Lachance
Managing Editor
Kris is the Managing Editor of Spreadsheet Secrets. He is a finance professional, writer and entrepreneur based in Canada.
How to Wrap Text in Google Sheets
Formatting
May 12, 2024
Google Sheets is a versatile tool that many use for organizing, analyzing, and presenting data. One common task in Google Sheets is wrapping text within cells. Text wrapping is particularly useful when dealing with lengthy strings of text that surpass the default cell width, enabling the content to remain visible without manually adjusting the column size. This guide will walk you through the steps to effectively wrap text in Google Sheets, enhancing both the readability and aesthetic of your spreadsheets.
Understanding What It Is
Text wrapping in Google Sheets refers to the process of fitting text within the confines of a cell by expanding the cell vertically. This ensures all content is visible without altering the width of the cell, which can be crucial for maintaining the structure and layout of your spreadsheet. Wrapped text is automatically adjusted according to the cell's width; if you change the width, the text reflows to fit the new dimensions.
How Do You Wrap Text in Google Sheets?
To wrap text in Google Sheets, you need to follow a simple procedure. First, open your Google Sheets document and select the cells where you want the text to be wrapped. You can select a single cell, multiple cells, or an entire column or row depending on your needs.
Once the desired cells are selected, navigate to the toolbar located at the top of the page. Here, you will find the "Text wrapping" button characterized by an icon with lines of text and an arrow indicating wrapping:
Click on this button, which will open a dropdown menu providing you with three options: "Overflow," "Wrap," and "Clip."
Overflow is the one on the left. It allows the text to spill over into adjacent cells if they are empty.
Wrap is the one in the center. It adjusts the height of the cell and wraps the text within its borders.
Clip is the one on the right. It cuts off the text that doesn't fit within the cell's width.
For text wrapping, select the "Wrap" option. The text within your selected cells will immediately be wrapped to fit the cell dimensions, expanding the cell vertically as needed to accommodate all text visibly.
How to Automatically Wrap Text in Google Sheets?
To automatically wrap text the default in Google Sheets for every cell you work with, you can set a default wrapping style for the entire sheet or specific ranges that you often use. This ensures that any text you input into these cells will automatically be wrapped without needing to adjust the settings manually each time. Here’s how you can do it:
Open Your Google Sheets Document: Start by opening your Google Sheets document where you want the text to be automatically wrapped.
Select the Range or Sheet: You can either select specific cells, entire rows, columns, or the whole sheet depending on your needs. To select the whole sheet, click on the square between the row numbers and column letters at the top left corner of the sheet.
Set the Wrapping Style:
Select wrap from the options, per the instructions above
Adjust Column Widths if Necessary: While the text will now automatically wrap according to the cell’s current size, you might still want to adjust the widths of your columns to accommodate the typical length of data you expect to input.
By setting the wrap text option as described, any data you input into the selected cells will automatically be wrapped, keeping your sheets neat and readable without additional adjustments each time you add new data. This is especially useful in sheets that are frequently updated or shared among multiple users.
Adjusting Cell Dimensions
While wrapping text automatically adjusts the cell's height, you may sometimes need to manually adjust the column width to achieve the desired formatting. This can be done by positioning your cursor on the line between two column headers until it turns into a double-sided arrow. Click and drag the boundary to increase or decrease the column width. As you adjust the column width, the wrapped text will reflow to fit the new width.
Is There a Shortcut?
Yes, there is a keyboard shortcut in Google Sheets to quickly apply text wrapping to selected cells, which can make the process faster and more efficient, especially if you frequently need to adjust text wrapping as you work.
Here’s how to use the keyboard shortcut:
Select the Cells: First, click on the cells or range of cells where you want to enable text wrapping.
Use the Shortcut:
For Windows and Linux users: Press
Alt+O, thenW, thenWagain. This sequence opens the Format menu, selects Text wrapping, and then chooses Wrap.For macOS users: Press
Option+O, thenW, thenWagain to achieve the same result.
This shortcut quickly toggles the wrap text setting for the selected cells without needing to use the mouse or touchpad to navigate through the menus. It's a convenient way to manage text wrapping as you work through your data in Google Sheets.
Tips & Tricks
Here are a few tips to enhance your experience with text wrapping in Google Sheets:
Uniformity: To maintain a neat and organized look, apply the same wrapping settings to entire rows or columns instead of individual cells.
Font size: Consider adjusting the font size if the text still appears congested after wrapping. Smaller font sizes can make the text fit better and look cleaner.
Cell padding: Adjust the cell padding to add some space around your text, making it easier to read. This can be done from the "Format" menu under "Cells" and then "Cell padding."
The Gist
Text wrapping in Google Sheets is a fundamental skill that enhances the presentation of your data by keeping it readable and well-organized. By following the steps outlined in this guide, you can efficiently manage lengthy pieces of text in your spreadsheets. Whether you are preparing a report, organizing data, or simply making your spreadsheet easier to read, understanding how to wrap text effectively is invaluable.
About the Author
Kris Lachance
Managing Editor
Kris is the Managing Editor of Spreadsheet Secrets. He is a finance professional, writer and entrepreneur based in Canada.

Spreadsheet Secrets
Helping you get better at all things spreadsheets. From learning functions to helpful tips and tricks. Microsoft Excel, Google Sheets, Apple Numbers, Office 365, whatever you use we can help you with.
Contact us here: ssheetsecrets@gmail.com
© 2024 Spreadsheet Secrets.
Spreadsheet Secrets
Helping you get better at all things spreadsheets. From learning functions to helpful tips and tricks. Microsoft Excel, Google Sheets, Apple Numbers, Office 365, whatever you use we can help you with.
Contact us here: ssheetsecrets@gmail.com
© 2024 Spreadsheet Secrets.
Spreadsheet Secrets
Helping you get better at all things spreadsheets. From learning functions to helpful tips and tricks. Microsoft Excel, Google Sheets, Apple Numbers, Office 365, whatever you use we can help you with.
Contact us here: ssheetsecrets@gmail.com
© 2024 Spreadsheet Secrets.